Are you looking for ways to back up your WordPress posts and pages in bulk?
WordPress offers a way to back its posts and pages using the default export tool, but it allows you to export only in .xml format, and you’ll be exporting it to your local computer, not storing it online. On top of all these, the export tool is not automated, which means you need to manually back up posts and pages time and again.
Nonetheless, In this article, we will show you how to use the default export tool to back up your WordPress posts and pages.
We will also demonstrate our WPSyncSheets For Core plugin to
- Backup posts and pages in Google Sheets and store them in your GDrive
- Setup automatic backups in Google Sheets, and
- Download posts and pages in .xlsx, .csv, .tsv, etc file formats
Let’s get started with the tutorials.
How to Backup WordPress Posts & Pages (2 Methods)
Method 1: Backup Using Export Tool
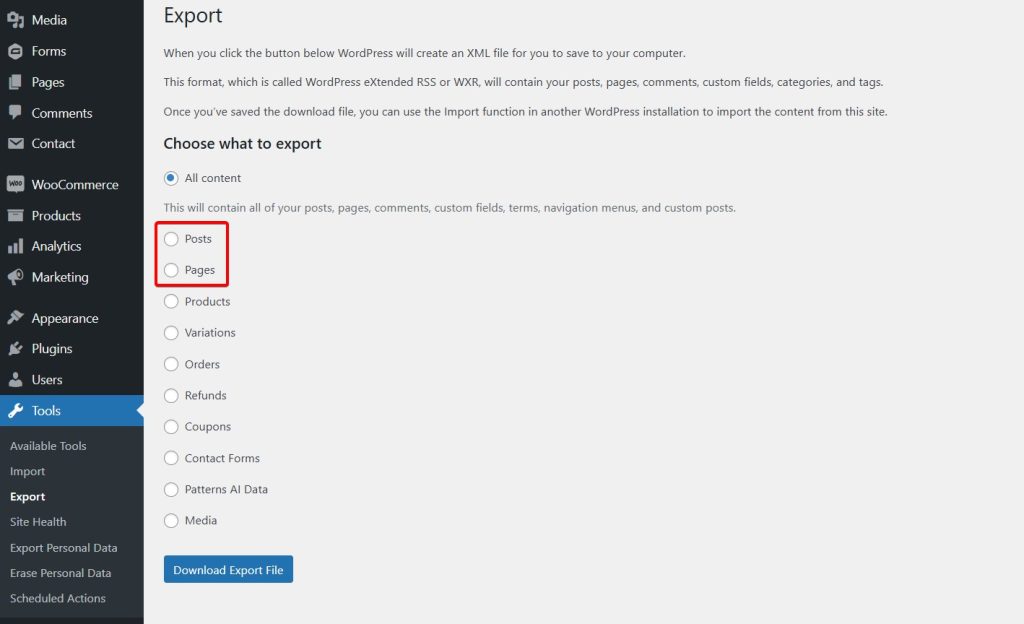
To backup posts and pages using the default WordPress export tool, open your WordPress dashboard, go to Tools → Export, select Posts or Pages, and hit Download Export File.
You can download posts or pages – one at a time.
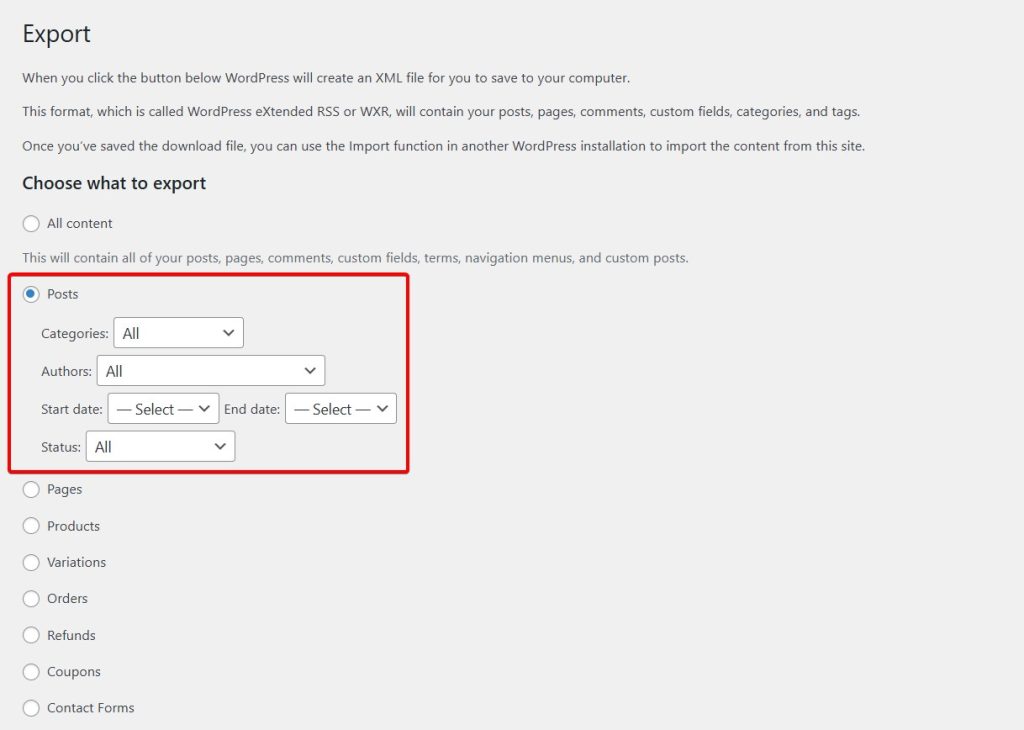
You can select the type of post or page to download. Filter by categories, authors, dates, and status.
That’s it! The posts or pages will be downloaded into your local computer. You can keep them there or upload them into online storage spaces like GDrive or Dropbox.
Method 2: Backup Using WPSyncSheets For Core
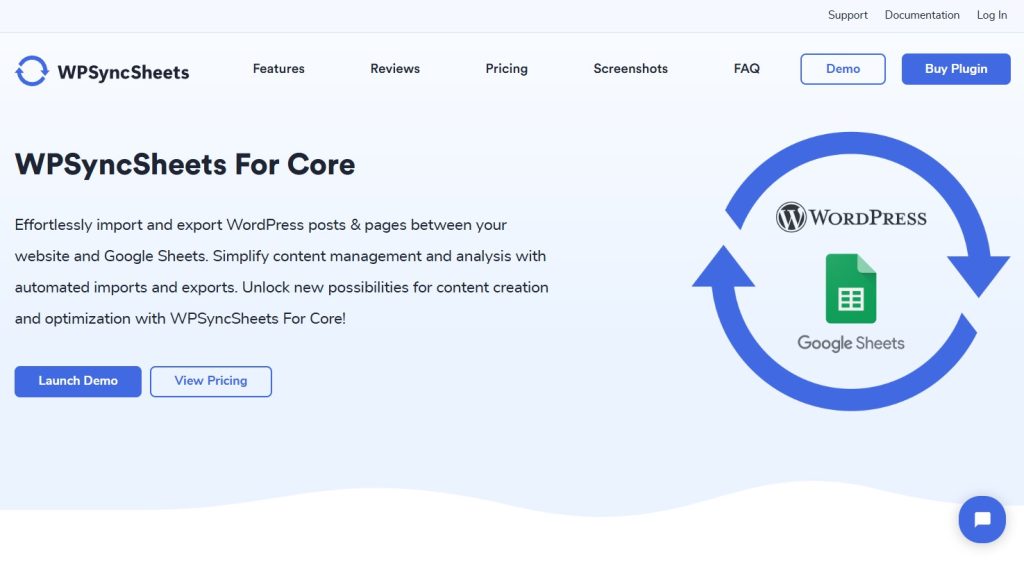
WPSyncSheets For Core is designed to migrate posts, pages, and custom post types from your WordPress website to Google Sheets.
You can even add, remove, or update existing posts, pages, and custom post types in the Google Sheets, and they will be synced into your website automatically.
It’s a premium plugin that comes at an annual cost of $49 for a single website license. You need to purchase the plugin before proceeding with the tutorial below.
Step i: Install & Activate WPSyncSheets For Core
Download the premium plugin to your local computer from your WPSyncSheets account or the welcome email you received upon purchasing the plugin.
Then, install and activate the plugin on your WordPress website by going to Plugins → Add New Plugin → Choose File → Install Now.
Next, find your unique license from the WPSyncSheets account or the welcome email and then add it to your website to activate the license. Go to WPSyncSheets → For Core → License.
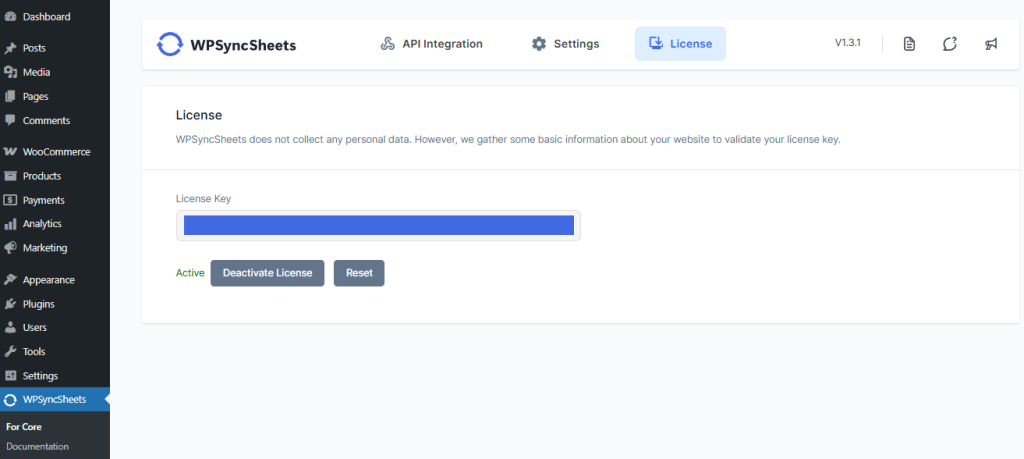
Step ii: Connect WordPress With GDrive
To export your posts, pages, and custom post-type data into Google Sheets, you need to connect your website to your GDrive account so that it can generate a Google Sheet on your GDrive.
The trusted Google API integration will help connect your website and GDrive together.
On your WordPress dashboard, go to WPSyncSheets → For Core → API Integration. You need to insert a Client ID, Secret Key, and Token to connect with your GDrive.
You can generate these from your Google Clouds Platform account. We have a separate guide on how to generate that information. Kindly follow that guide.
Add that information to the API integration page, and your WordPress website will immediately connect to your GDrive account.
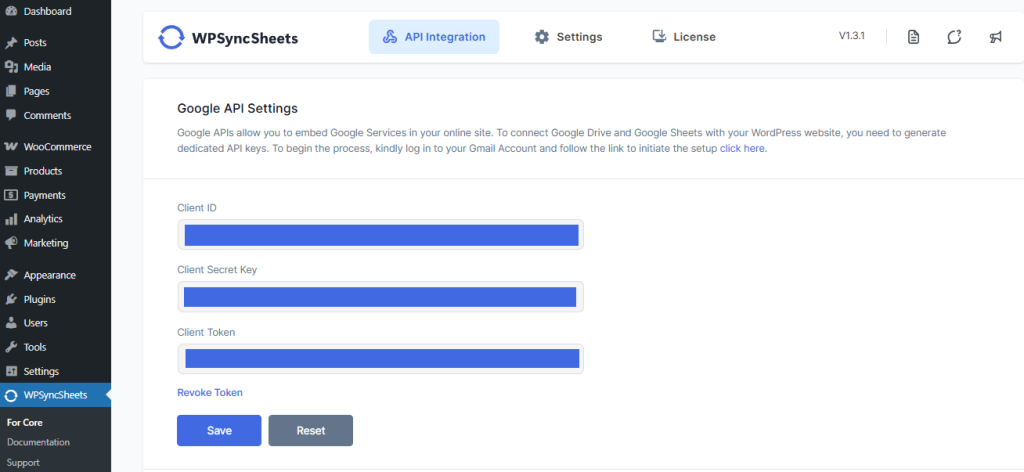
Step iii: Prepare For Export
Go to WPSyncSheets → For Core → Settings → Post Settings and toggle on the Post Settings option.
Navigate to the Default Post Type as Sheets section and toggle on the Posts and Pages options.
In the Sheet Header section, select or deselect columns that will appear on the Google Sheets where your posts or pages will be exported.
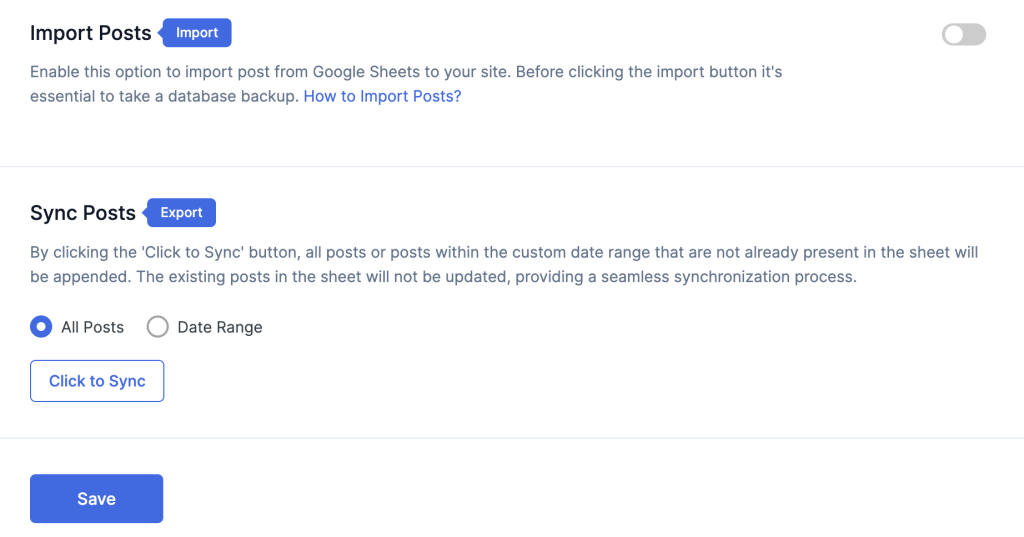
In the Sync Posts section, you can choose a date range to ensure posts and pages from a specific timeline are exported.
Don’t forget to hit the Save button when it’s done.
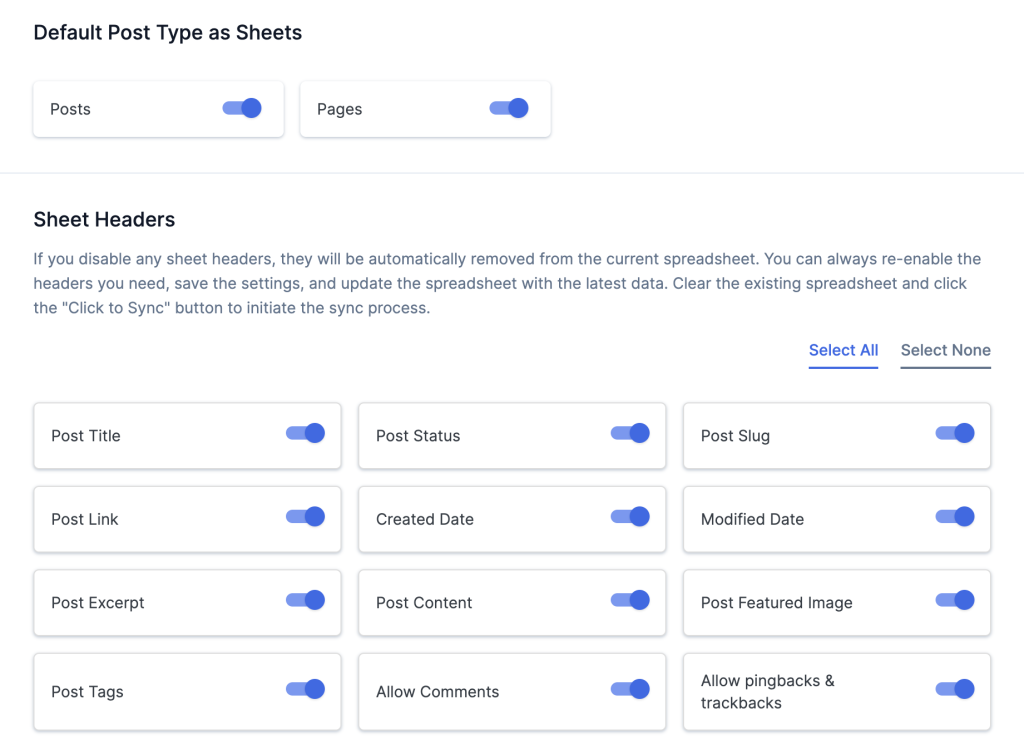
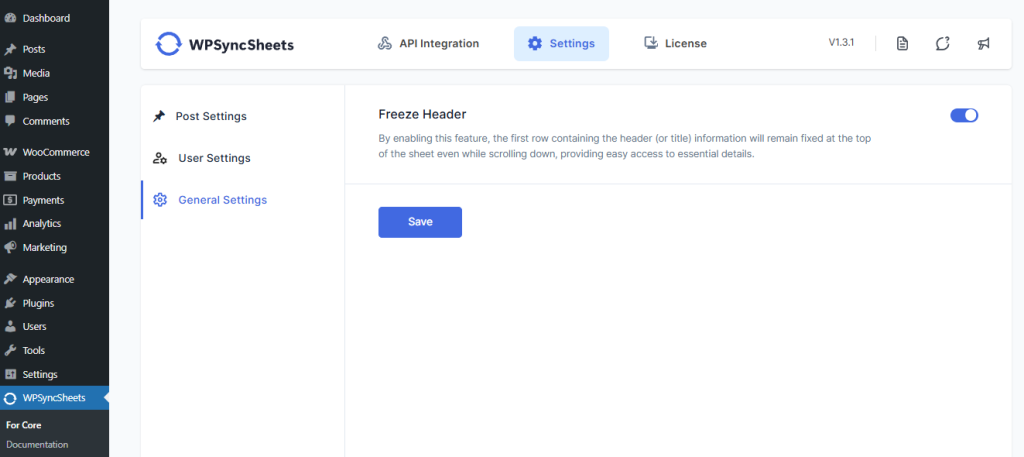
Now, go to General Settings and toggle on the Freeze Header option to freeze the first row containing the header in your Google Sheets. This is optional but recommended.
Step iv: Export Post & Pages into Google Sheets
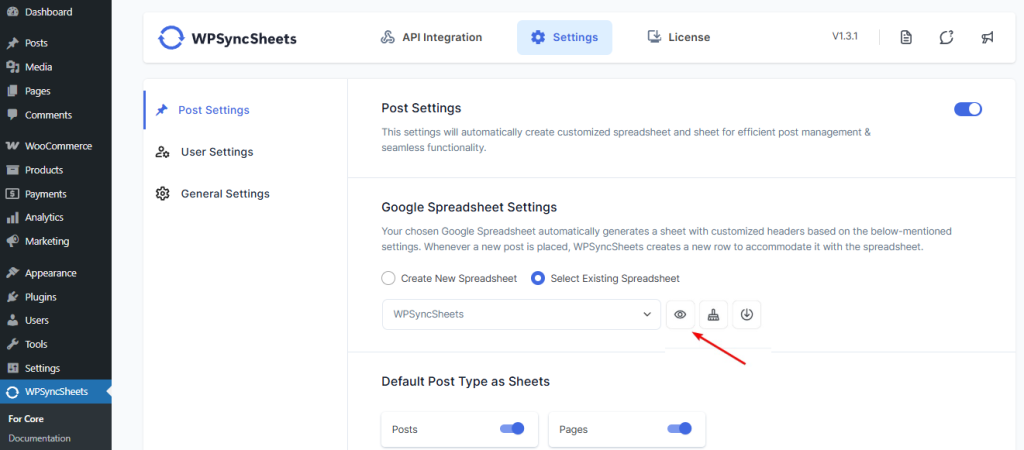
It’s time for the export. Go to Post Settings → Google Spreadsheet Settings, select the Create New Spreadsheet option, add a name, and hit enter.
Then select the Select Existing Spreadsheets option, choose the spreadsheet you just created from the dropdown menu, and hit the eye button to open the spreadsheet in a new tab.
Alternatively, you can hit the download button to download the Google Sheets with post and page data into your local computer.
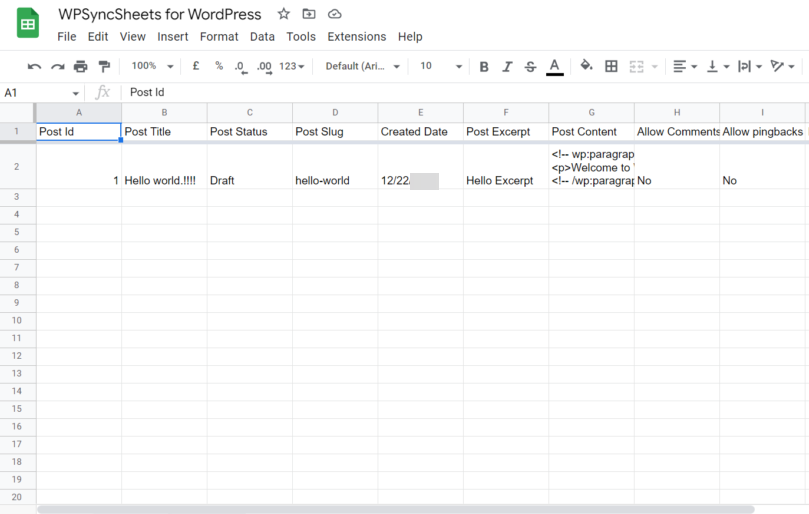
This is how the Google Sheets containing posts and pages would look:
Step v: Set Automatic Export/Backup
WPSyncSheets takes care of automatic backup. Wherever you add new posts and pages, it’s automatically backed up in the Google Sheets.
Conclusion
Backing up your WordPress posts and pages is a crucial step in protecting your website’s content from potential losses or damages.
While WordPress offers a default export tool, it has limitations such as manual backup and limited file format options.
The WPSyncSheets For Core plugin provides a more comprehensive solution, allowing you to back up your posts and pages in Google Sheets, store them in your GDrive, and set up automatic backups.
With this plugin, you can also download posts and pages in various file formats and use the same Google Sheets to add, update, or delete existing content on your WordPress website.
By following the step-by-step guide outlined in this article, you can ensure that your WordPress posts and pages are safely backed up and easily accessible.
Frequently Asked Questions (FAQs)
How do you back up all posts and pages from WordPress website?
You can back up all your WordPress posts and pages by going to Tools → Export, selecting Posts or Pages, and hitting Download Export File.
Alternatively, use our WPSyncSheets For Core plugin to back up the posts and pages in Google Sheets on your GDrive.
Just install and activate the plugin, connect your WordPress website with GDrive, configure the settings, generate a new Google Sheets, and export all your posts and pages into Google Sheets. You can use the same Google Sheets to add new, update, or delete existing posts and pages on your WordPress website.
How do you download all posts and pages from WordPress website?
You can download all your WordPress posts and pages by going to Tools → Export, select Posts or Pages, and hit Download Export File.
Alternatively, use our WPSyncSheets For Core plugin to download the posts and pages in Google Sheets on your GDrive.
Just install and activate the plugin, connect your WordPress website with GDrive, configure the settings, generate a new Google Sheets, and export all your posts and pages into Google Sheets. You can use the same Google Sheets to add new, update, or delete existing posts and pages on your WordPress website.
How do you export all posts and pages from WordPress website?
You can export all your WordPress posts and pages by going to Tools → Export, select Posts or Pages, and hit Download Export File.
Alternatively, use our WPSyncSheets For Core plugin to export the posts and pages in Google Sheets on your GDrive.
Just install and activate the plugin, connect your WordPress website with GDrive, configure the settings, generate a new Google Sheets, and export all your posts and pages into Google Sheets. You can use the same Google Sheets to add new, update, or delete existing posts and pages on your WordPress website.


