Are you looking for a way to connect Google Sheets with your WooCommerce website?
Connecting WooCommerce with an external Google Spreadsheet can help you manage your store’s data more efficiently. You can use and share this data to make critical business decisions and even keep track of things in a more structured format.
In this article, we’ll see how you can connect and automate Google Spreadsheets with your WooCommerce store and start collecting crucial data such as orders, products, customer, and event data.
Before we go to the step-by-step guide, let’s first understand how this integration can benefit your WooCommerce business.
Why Connect WooCommerce to Google Sheets?
Data is one of the most important aspects that can make or break any business. If you want to ensure that your store performs well, day-to-day business information is worth its weight in gold.
Apart from getting access to valuable data, there are benefits as well. Here are some of the most prominent reasons why connecting WooCommerce with Google Sheets is a good idea.
- A perfect tracker: While it may not be easy to log in to the WordPress website every time when you want to check your store’s data, simply opening a Google Sheets file with a single click definitely makes things easier. You can have access to data you have automated in seconds.
- Easy sharing: If you want to share your store’s data with various departments of your business, such as inventory or marketing, simply sharing an automated Google Sheets is way easier than creating new user access for every team member individually.
- Useful for long-term analysis: It is always recommended that every big business decision is backed by some data research. Here, a live spreadsheet with all data related to your store can be a very helpful tool. You can apply filters, run formulas and make forecasts to make more informed decisions for your eCommerce business.
- Advanced actions: While WooCommerce has its own analytics dashboard, it sometimes lacks if you are looking for specific insights. You can set up graphs, charts, reports, or even a full-blown data studio dashboard with your data in Google Sheets.
With all these advantages in mind, let’s see how you can integrate WooCommerce with Google Sheets.
How to connect WooCommerce with Google Sheets
To connect WooCommerce with Google Sheets, we recommend using the WPSyncSheets for WooCommerce plugin. The plugin is specifically designed to help you move data from your WooCommerce store to an external Google spreadsheet.
It is loaded with features that can help you manage your data and create automated data flows for your store. You can set it up in minutes and start importing data in no time.
While the plugin is loaded with features, here are some of the notable features of the WPSyncSheets for WooCommerce plugin:
- Easily import and export WooCommerce orders, customer data, products, and even various events data.
- Customize data such as columns, fields, and entries.
- You can easily create auto-export schedules and keep a tab on your store’s activities.
- The plugin is compatible with 35+ external WooCommerce plugins and also comes with multi-language and multi-site support.
- Easy setup and installation make it super quick to get started and automate data flows.
- It is designed with quality coding standards in mind and is also 100% translation-ready.
Let’s see how you can connect WooCommerce with Google Sheets with the WPSyncSheets addon.
Installing the plugin
To get started, first, you need to install the plugin.
The plugin comes in two versions, Free and Pro. The pro or the paid version comes with additional useful features. We recommend using the paid version so you can make the most out of your eCommerce business data.
In this tutorial, we’ll be using the pro version. If you do not have the pro version, you can get it here.
Once you have the plugin, log in to your WordPress website. Head over to Plugins > Add New.

Click the Upload Plugin button and upload the zip file you downloaded earlier.
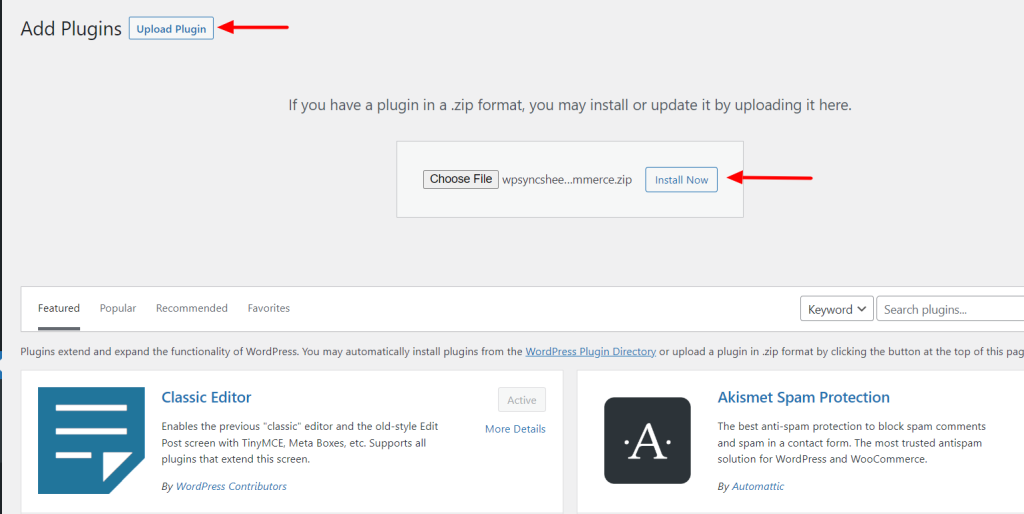
Click the Install button and once the installation is finished, hit the Activate button.
Now go to WPSyncSheets and copy-paste the license keys into the respective field. The plugin is now ready to use.
Connecting with Google Sheets
To start exporting/importing data, you need to connect both using the Google API.
Here’s how you can do it.
Go to WordPress Admin > WPSyncSheets. Go to the Google API Settings tab. Here you need to enter the Client ID and the client secret key.
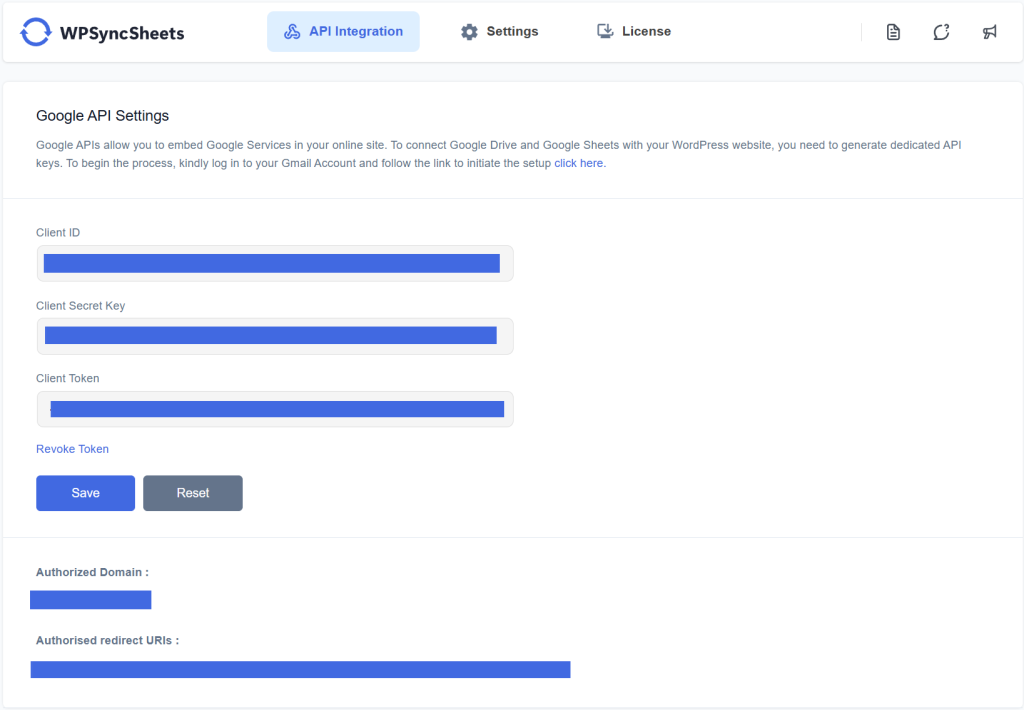
If you have the details, you can copy-paste them directly.
If you don’t have the ID and the secret key, here’s how you can get it.
Setting up Google Client ID and Secret Key
Visit the Google Cloud API dashboard.
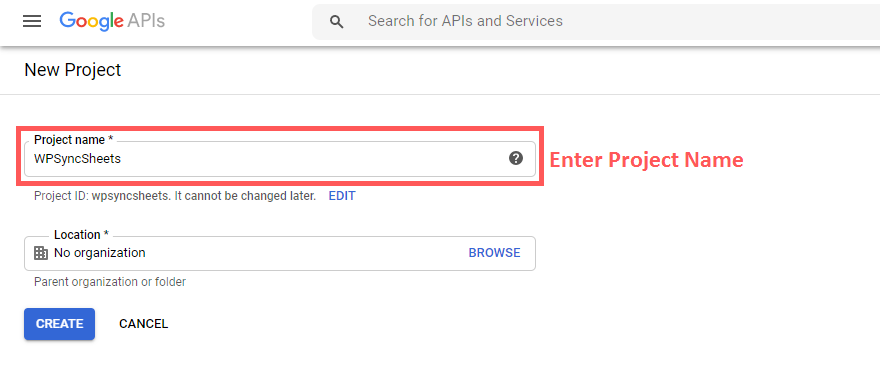
Create a new project by going on Select a project at the top left corner and clicking on the New project link in the popup window.

Give your project a proper name and click on the Create button. This might take a few seconds.
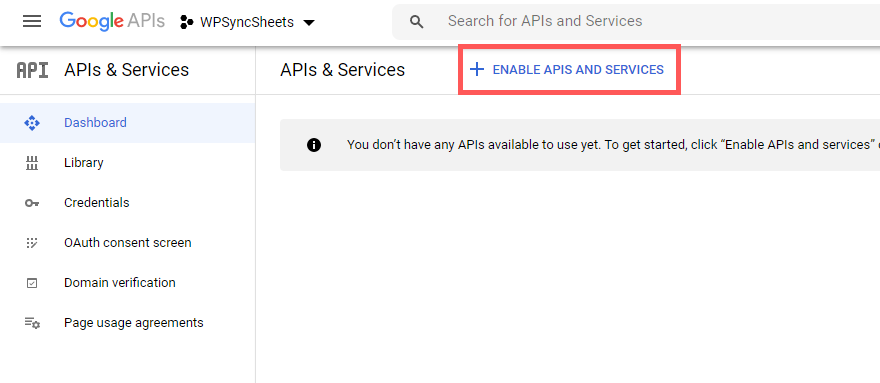
Now once the project is ready, click on the + Enable APIs and services link at the top. Search for Google Drive API and enable it.
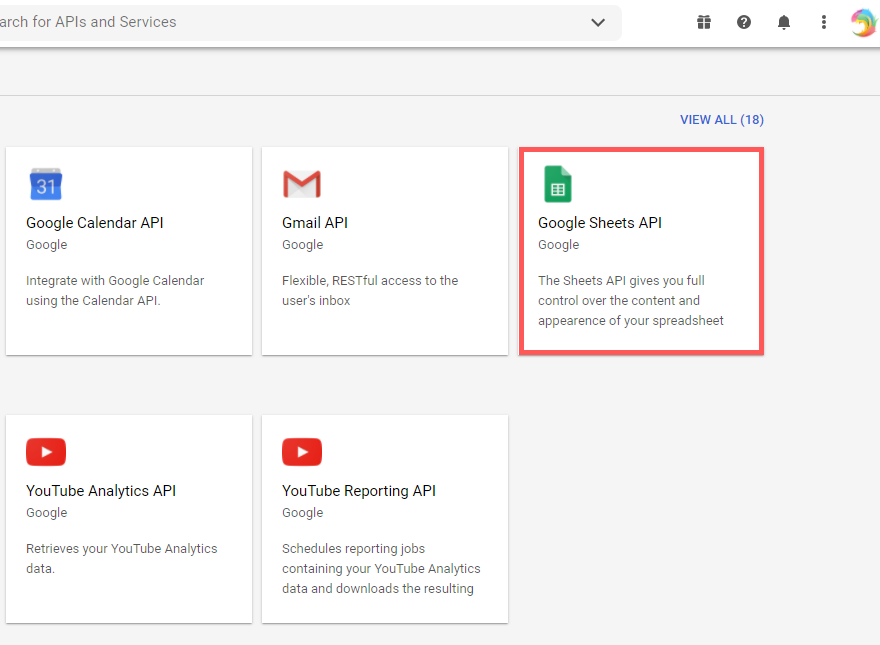
Go to API and services > Library and look for Google Sheets API. Enable the Google Sheets API.
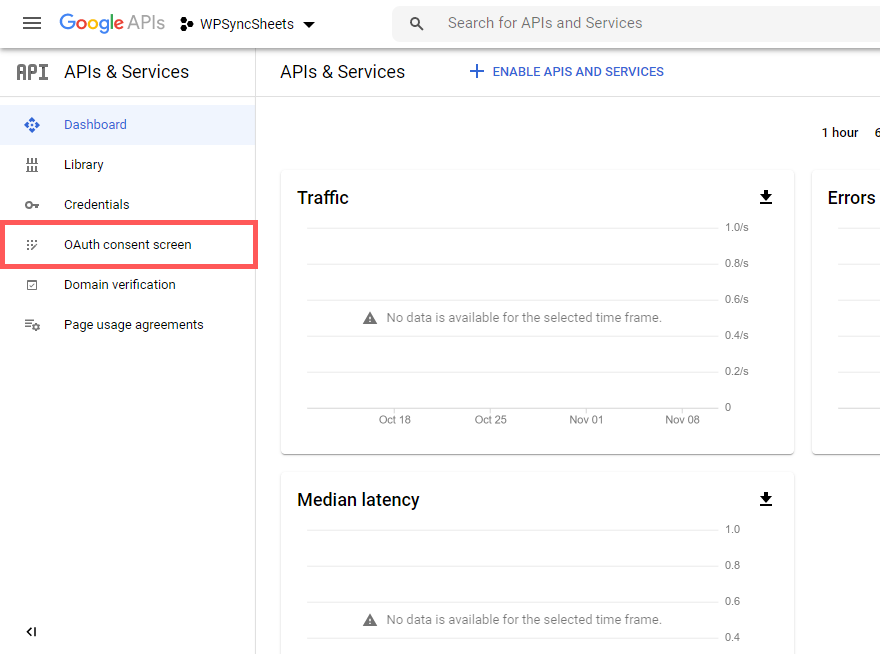
Again go back to APIs and Services and click on the OAuth consent screen. Here we’ll register the app, including the target user.
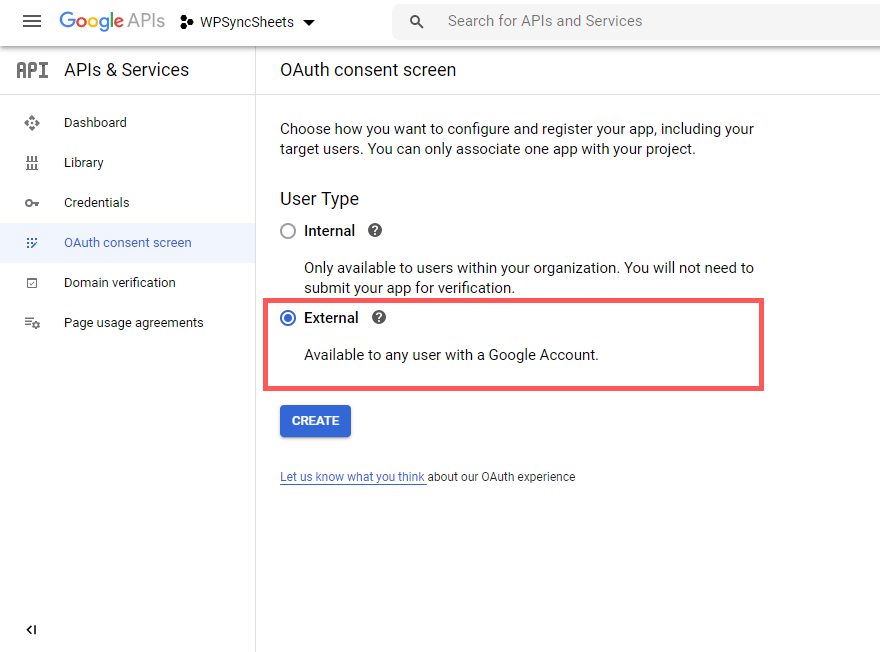
Select External and click on the Create button.
In the App information screen, enter the App name as “WPSyncSheets”.
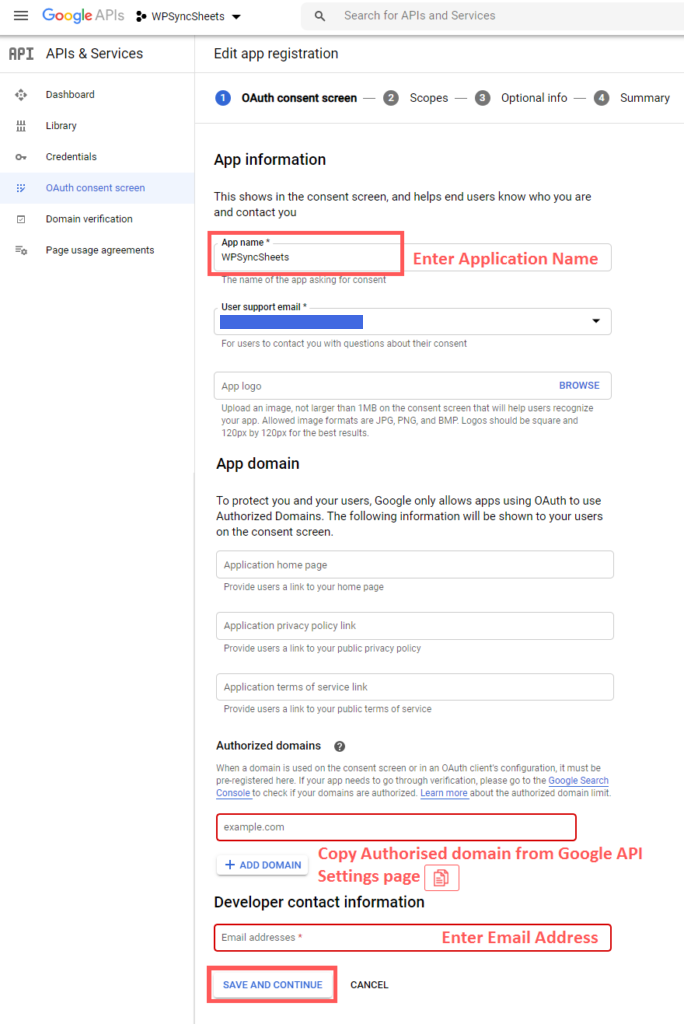
You also need to copy and paste the authorized domain (the domain you are connecting). For this, go back to your WordPress dashboard > WPSyncSheets > Google API settings and look for the Authorized domain. Copy it and paste it into the respective field of the Google App information screen.
Once you are done, click on the Save and Continue button.
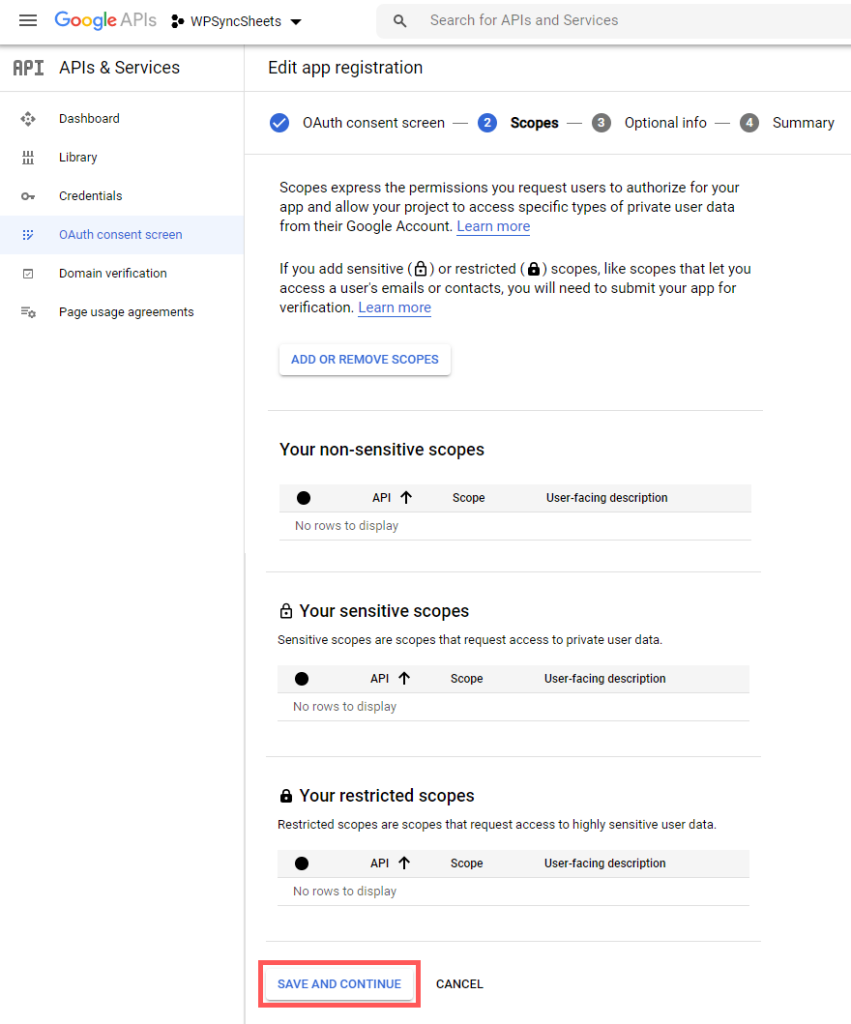
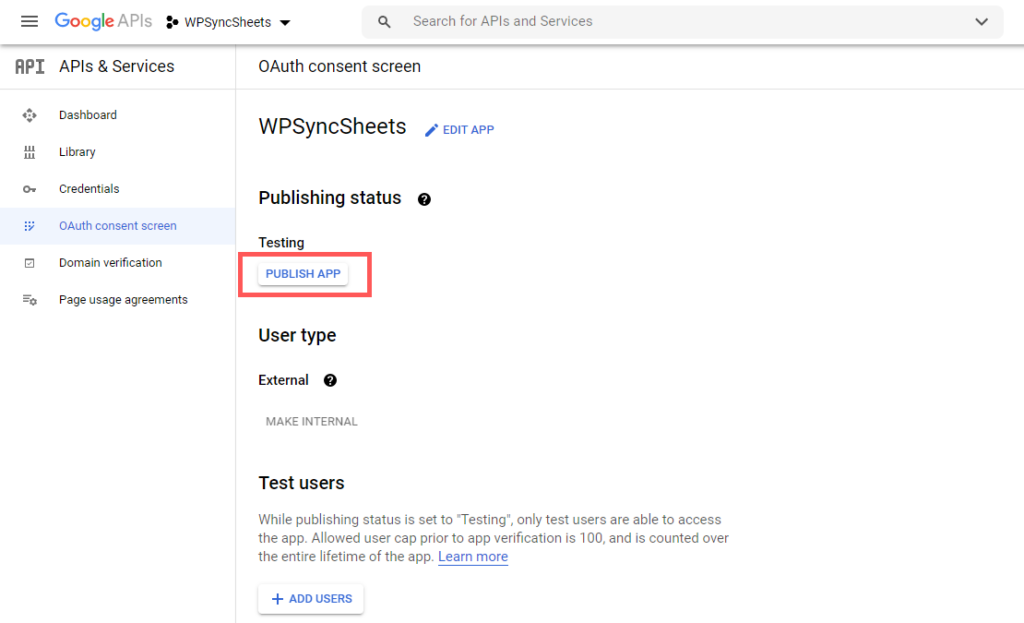
You don’t need to make any changes to the Scopes and Optional Info screen, so you simply click on the Save and Continue button and check the OAuth consent summary. Click on the Publish App button.
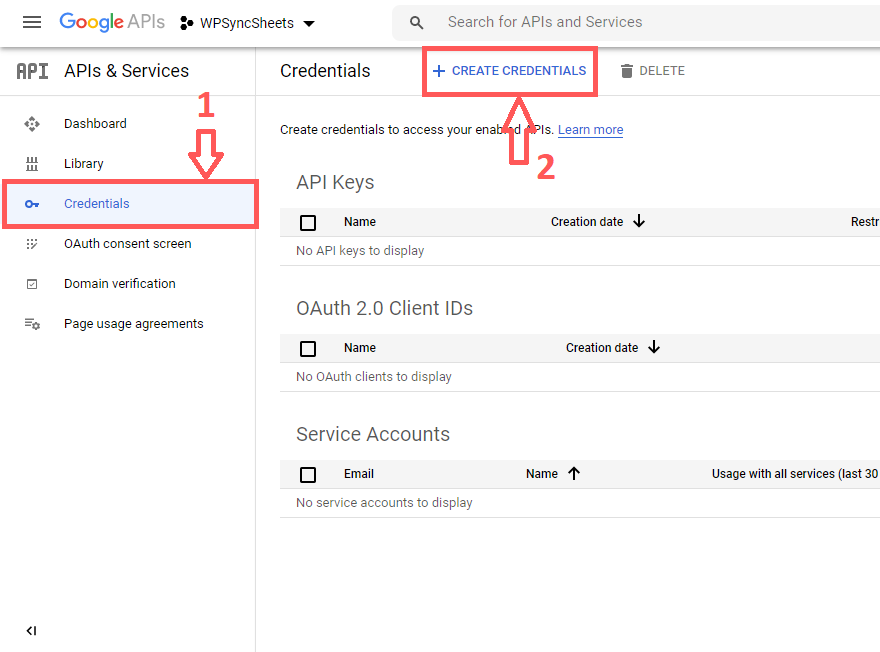
Now for the final step, you need to obtain the credentials for your website.
Go to credentials > Create credentials and select OAuth client ID. This requests user content so the app you are connecting can get access to the user’s data.
Select the Application type as Web Application. Enter the name as WPSyncSheets. Copy the authorized redirect URI (uniform resource identifier) from WP Dashboard > WPSyncSheets > Google API settings. Click on the copy icon to copy it to your clipboard and paste it into the Authorized redirect URIs field in the setup process. Hit enter to add the URI.
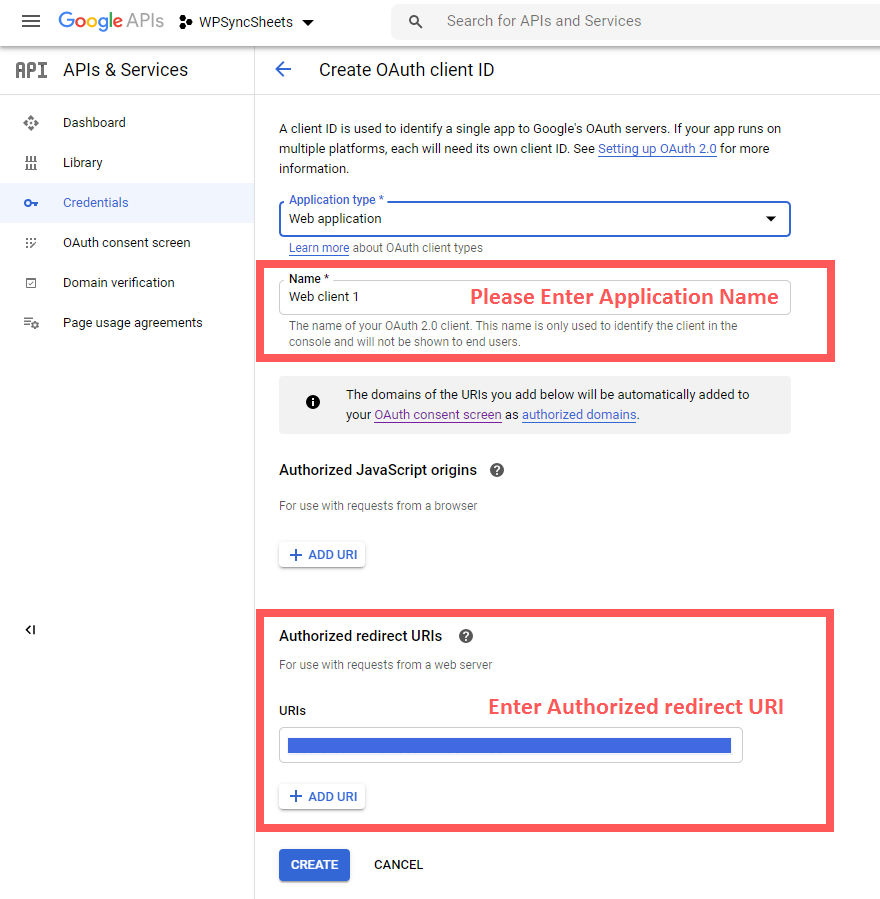
Click on Create, and you’ll be redirected to a popup window that contains the OAuth client details.
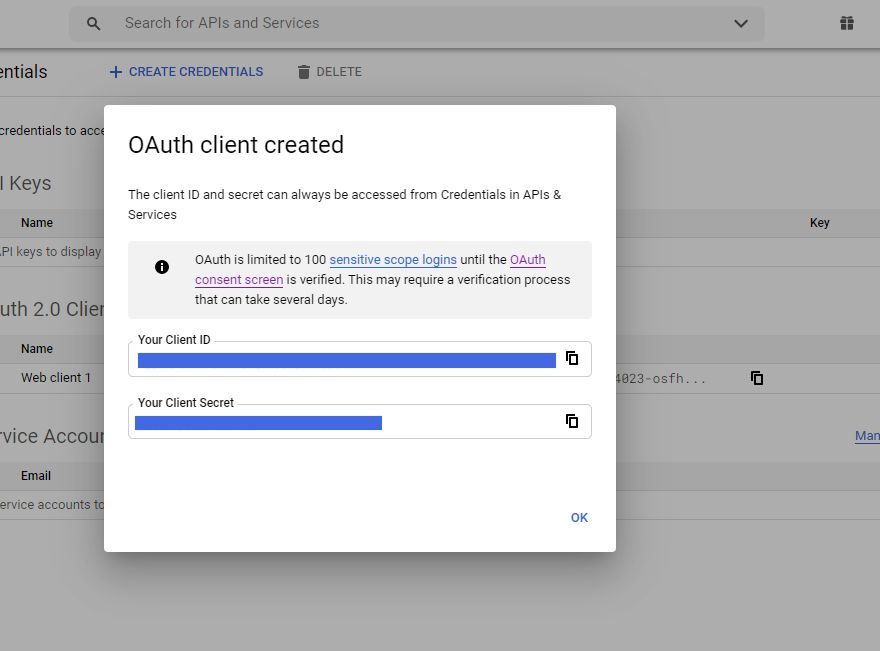
Now you can copy-paste the details to your WPSyncSheets dashboard. Once done, click on the Save button.
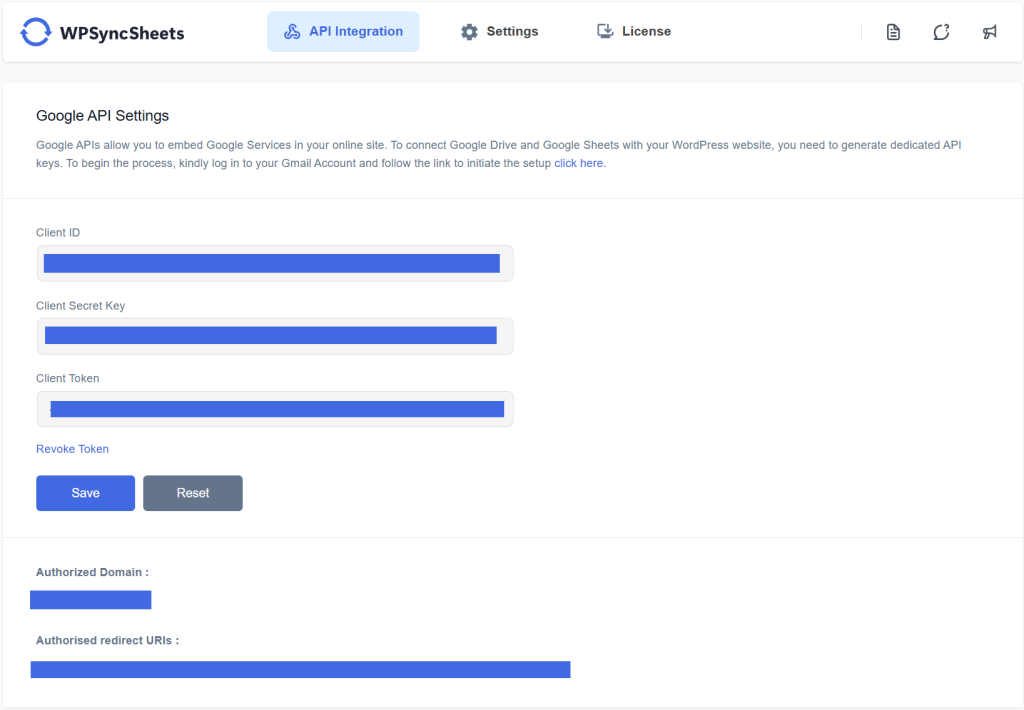
You’ll see a client token button popping up. If you don’t see this field, retry copy-pasting your Client ID and Client secret key and clicking on the Save button.
Click on the Generate button, and you’ll be redirected to complete the integration process. Once completed, click the Save button.
You have now successfully connected your WooCommerce store with your Google Sheets account.
Let’s see how you can start importing products.
Exporting WooCommerce orders to Google Sheets
Now that the plugin is fully set up, let’s see how you can import order data to your Google Sheets.
The plugin exports various data types automatically, and you simply need to set it up once.
Go to the plugin settings page and go to General Settings.
Select Create a New Spreadsheet option from the list and give it a proper name.

In Default Order Status, enable the orders you want to export. Each enabled option will create a new sheet in the database.
Since we are creating a store orders table for our WooCommerce store, select the Order-wise toggle button in the Manage Rows Data setting.
In the Sheet headers option, enable the headers that you want to export to your spreadsheet. You can also import all data fields as headers.
Further, you get additional options such as freezing headers, changing row colors, etc. Feel free to customize these options the way you want and click on the Save button.
Now all data is exported to your spreadsheet, and you can get access to the spreadsheet by clicking the View Spreadsheet button.
You now have access to all data related to your WooCommerce store orders.
You are all set now. With every new order, the integration will add a new field automatically.
Connect your WooCommerce store with Google Sheets now!
With the WPSyncSheets WooCommerce addon, you can create powerful automation for your eCommerce store. You only need to perform the aforementioned steps once, and the automation will keep your sheets updated automatically.
Exporting order data is just the tip of the iceberg. You can perform many more actions with the WPSyncSheets WooCommerce plugin, such as:
- Import customer, product, and order data to your store.
- Add, edit, delete or even reorder table columns.
- Give sheets access to multiple accounts without having to create WordPress user accounts.
- Generate graphs and see how your store is performing.
- Add filters and formulas to keep a granular track of your eCommerce store.
- Access plugin settings in a different language as it is 100% translation-ready.
If you want to install WPSyncSheets Pro on your website, you can get it here.
If you still want to learn more about the plugin before using it on your website, you can check out the free version available on the WordPress.org repository. You can download it for free here.
Let me know what you think about the WPSyncSheets plugin. What data are you planning to export? How do you plan to use that data? Tell us in the comment section below!


