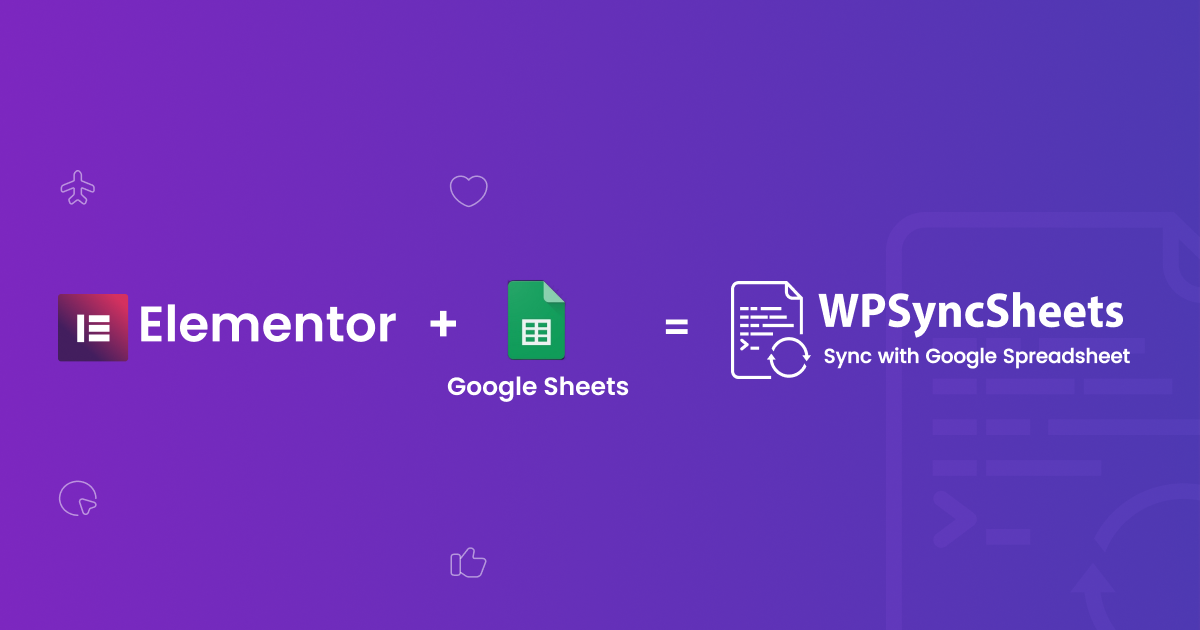
WPSyncSheets For Elementor that focuses on the Form entries flexibly within one single Google Spreadsheet. With its unique feature, users can add/edit sheet headers names on their own and they can also rename the existing sheet headers name within the spreadsheet. Plugin provide easy way to connect Elementor form to google spreadsheet. Export all the Elementor form entries to google spreadsheet.
If we talk about the admin side, they can also easily create a new spreadsheet and new sheet in the settings page, we’re going to show you step-by-step how to connect Elementor to Google Spreadsheet.
If you’re looking to generate entries on your WordPress site, the Form widget in Elementor Pro makes it easy to create front-end forms to collect as much or as little information as needed from your entries.
Once you’ve done that though, you need to organize and manage those entries after they’ve submitted your form.
In this post, I’m going to show you how to connect Elementor Form to Google Spreadsheet.
Google Spreadsheets is a super simple and free way to manage entries/leads. Plus, because most of us are familiar with working on spreadsheets, it’s easy to get up and running and you’ll feel right at home when managing your form entries. User just need to set up once and all the entries will be added automatically into the google spreadsheet.
Keep reading for a step-by-step guide on how to connect Elementor to google Spreadsheets to automatically add new entries as rows in your spreadsheet.
What You Need to Connect Elementor to Google Spreadsheet
To follow this tutorial and connect Elementor Form to Google Spreadsheets, you’re going to need a few things :
Elementor Pro – you need Elementor Pro plugin to access the Form widget and here you don’t need any app such as Zapier integration, which is not at all essential.
Google Sheets access – if you have a Google account, you already have access to Google Sheets.
How to Connect Elementor to Google Sheets
1. Create new Elementor Pro Form
To get started, you need to create your lead capture form using the Form widget in Elementor Pro.
You have a few options here. You can:
- Create a dedicated landing page that includes the Form widget.
- Add a form to an existing page using template and its shortcode.
No matter which method you choose, the setup steps will be the same because all of the configuration happens within the Form widget’s settings.
As long as you’re using the form widget in Elementor Pro, you’ll be able to sync up with Google Sheets. It doesn’t matter where you display the Form widget.
No matter which method you choose, the setup steps will be the same because all of the configuration happens within the Form widget’s settings.
For this example, I’ve created a popup that contains the Form widget. In the form, I’ve set up three fields for:
- First name
- Last name
- Email Address
You can add as many or as few fields as needed, though. Later on, you’ll be able to map all the fields to columns in your Google Spreadsheet:
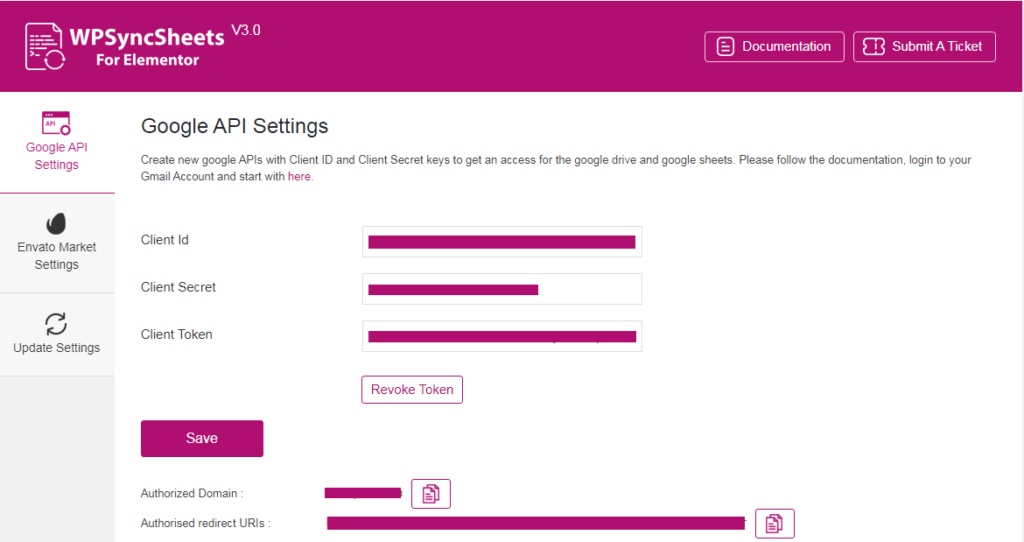
> Go to ElementorSheets => Google API Settings
1. Client ID and Client Secret Keys as per the documentation here.
Client Token by clicking to the button “Click here to generate an authentication token.” with allowing the access and paste of the code within the Client Token field.
Note: Client Token will only be created if you will have added Client ID and Client Secret Keys with above fields.
2. WPSyncSheets For Elementor Settings
Pages => Edit with Elementor
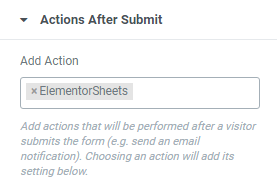
Edit your form or insert a new form and click on Actions After Submit option.
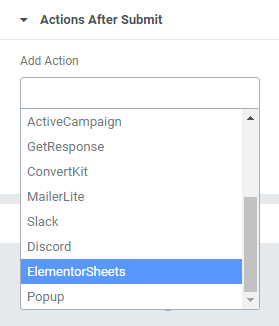
3. Select ElementorSheets in Actions After Submit
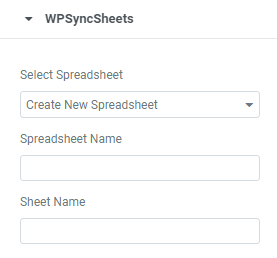
4. WPSyncSheets For Elementor Spreadsheet Settings
WPSyncSheets For Elementor Settings with Existing Spreadsheet
Select existing Spreadsheet Name from Select Spreadsheet Dropdown and Enter Desire Sheet Name.

OR
WPSyncSheets For Elementor Settings with Create New Spreadsheet and New Sheet
You can create a new spreadsheet and create a sheet directly from ElementorSheets settings. (no need to go with Google Drive). It will automatically set the default headers (Fields Name at first row) as per the form fields into the spreadsheet. Please refer to the below screenshot for more details.
5. Enter Headers Name
In this section users can easily add / remove / sort sheet headers.
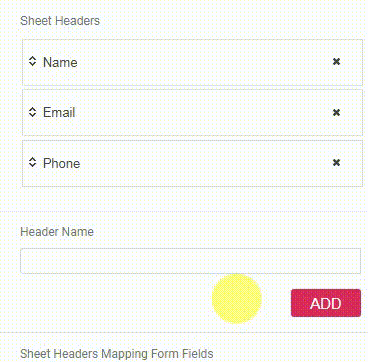
6. Sheet Headers Mapping Form Fields
This allows the user to associate left side sheet headers with the right side form fields, so that it can map the row within the Google Spreadsheet whenever form data is inserted.

Freeze Header
Users can easily freeze the header row (first row) of the sheet with the settings page option. It can be easily enabled/disable whenever we need it.

Submission Date
Enable/Disable Submission Date to add current date and time after filling the form.

Page Referer Url
Enable/Disable Page Referer Url to add Page Referer Url after filling the form.

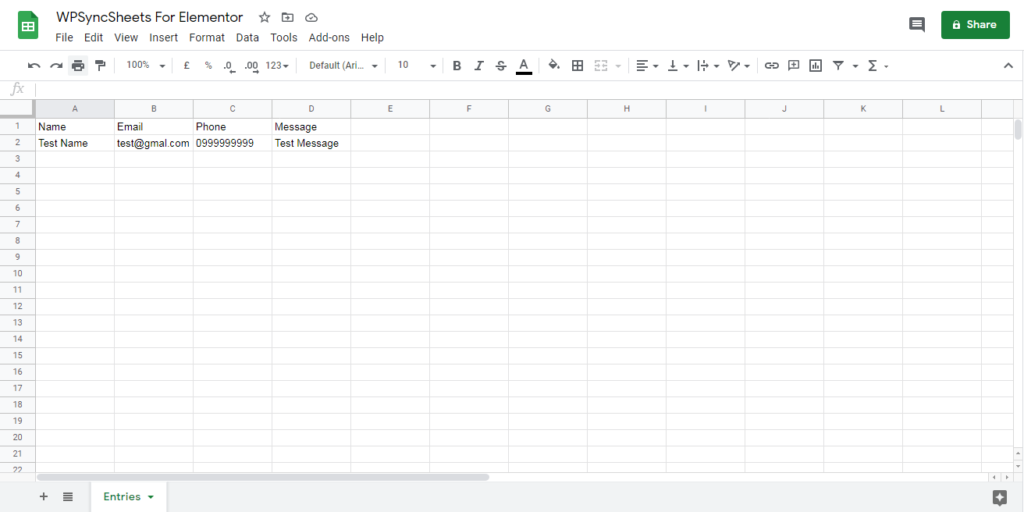
Updated Google Sheet
Conclusion
With the form widget in Elementor Pro, it’s easy to create entry generation forms that connect to Google Sheets(without using any other app such as Zapier).
You can set up your spreadsheet so that it meets your business needs and customize all the information that you as a user have collected.
To get started, please purchase the WPSyncSheets For Elementor today and then follow the steps in this tutorial to set up the integration.
If you have any additional questions about how to connect WPSyncSheets For Elementor to Google Spreadsheet? Ask away in the comments section!