Contact Form 7 is one of the most popular WordPress contact form plugins. It is free and packed with all the necessary features that a typical website developer will require. It lets you easily display functional contact forms on your website and enables your website visitors to submit those forms.
While Contact Form 7 is perfect for collecting submissions by visitors, there are better solutions for managing them, especially when there are tonnes of submissions!
Since most contact form data can be arranged tabularly, it makes Google Sheets the best tool for managing submissions. Although Contact Form 7 does not automatically integrate with Google Sheets, there is a very easy way to do this.
In this blog post, we’ll show you how to set up and integrate Google Sheets with Contact Form 7 and start automatically sending form data. Not only will this save time, but it also eliminates any risk of human error when moving the entries or data.
We’ll walk you through the steps of setting up a Google API key and configuring the integration settings in Contact Form 7. We’ll also offer some tips for organizing and managing your data in Google Sheets. By the end of this post, you’ll be a pro at automatically sending Contact Form 7 data to a Google Sheet. Let’s get started!
Why Connect Sheets with Contact Form 7?
Contact Form 7 is one of the most popular contact form plugins in the market, and while it sits among the best, there can be instances where you will find managing entries in Google Sheets easier. Here is how connecting Google Sheets with Contact Form 7 is going to help you:
- With Google Sheets and Contact Form 7 integrated, you can automatically store and organize entries of data in a tabular format.
- It overall makes it easier to manage and analyze data later.
- You can further share and give access to data without the need to set up a separate account. Simply sharing the sheet with a new account will do the job.
- You no longer need to manually copy and paste data from the form entries in a spreadsheet. The automation will do it for you.
- It gives you a broader look at the process and provides ease of access to monitoring and tracking submissions from a single place.
- You can further use the spreadsheet to trigger automation and workflows by integrating the spreadsheet using the Google Sheets’s APIs.
- Also, it creates a robust database of leads or customer information.
How to Connect Google Sheets with Contact Form 7?
In this section, we’ll see how you can connect your WordPress website’s Contact For 7 to Google Sheets.
For this, you’ll need a WordPress website and a Google Account which you’ll be integrating later. If you do not have a Google Account or a WordPress website, you can set it up before starting the integration process.
Let’s first create a simple form on your website with the Contact Form 7 plugin.
Installing and Setting up Contact Form 7
To install Contact Form 7, follow these steps:
- Go to Plugins > Add new in your website’s admin dashboard.
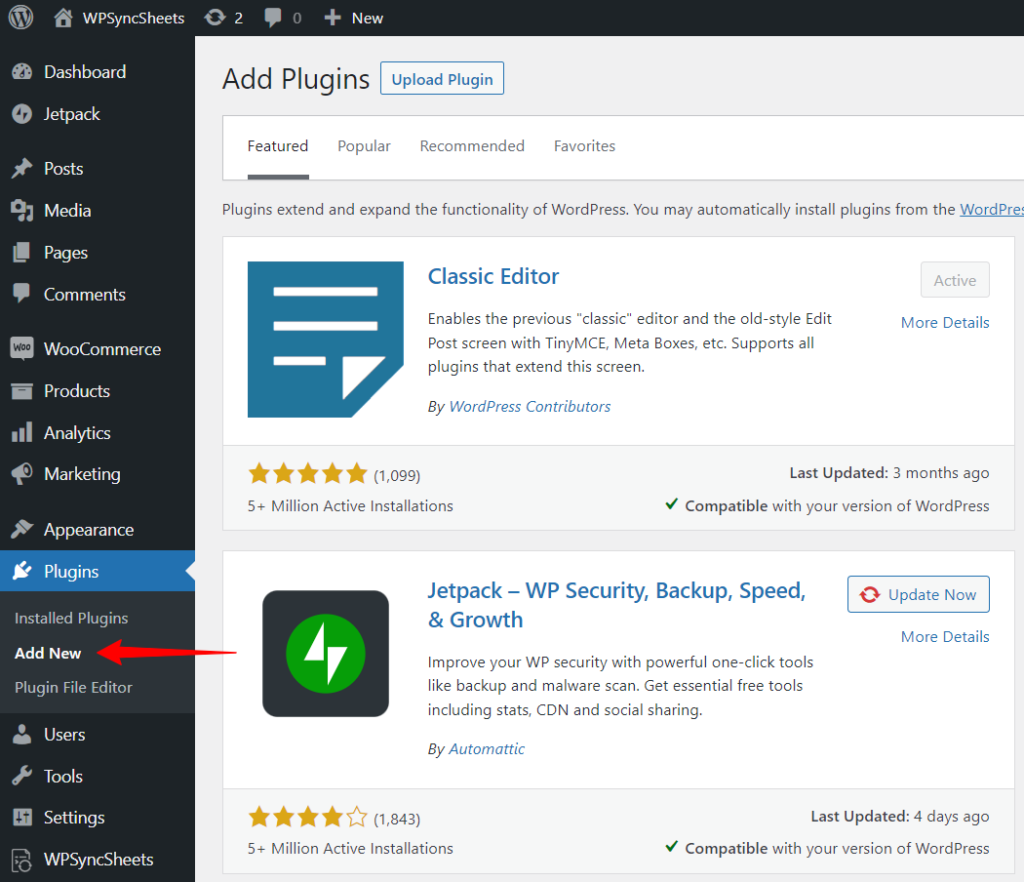
- Now look for the Contact Form 7 plugin and click on the Install button.
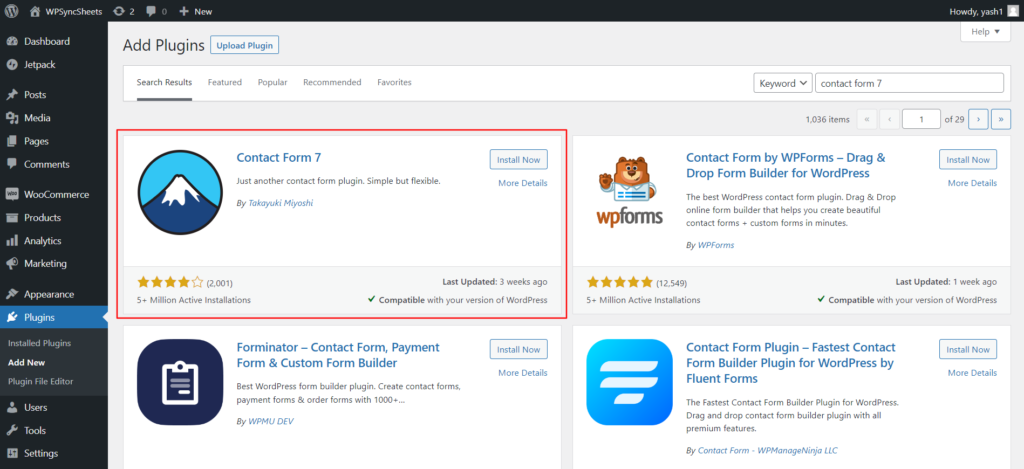
- Once the plugin is installed successfully, click on the Activate button.
Now that you have your plugin ready to use let’s see how you can create a simple form with Contact Form 7.
Creating a Contact Form
The plugin automatically creates a basic form for you to start with. You can either use this form and make some changes to it to create an entirely new form.
If you want to create a new form, here’s how you can do it.
Go to Contact > Contact Forms. Click on the Add New button and enter the name of your new contact form.
You will notice that Contact Form 7 has already created a basic form structure for you. You can use the same structure, as you will eventually need the default field in most cases.
If you wish to add new fields, you can pick them from the tags available at the top of the editor panel. For example, if you want to add a URL field, you can simply click on the URL button, and a popup will appear with options to help you add a URL link to your contact form.
Once you are done, click the Save button to make the form live. Now you can copy-paste the shortcode wherever you want, and it will be displayed on your website.
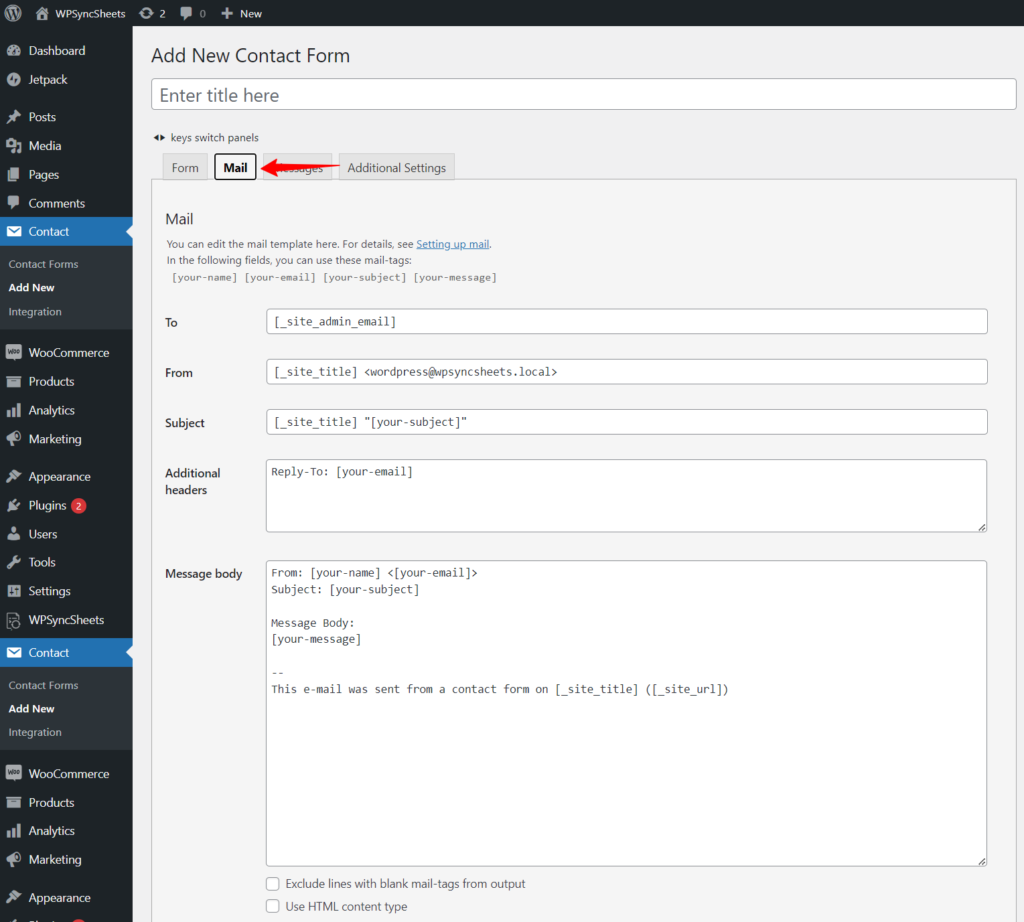
You also need to configure mail delivery settings as well.
For this, go to the Mail tab next to the Form tab in the editor and enter the required details.

Here’s what you need to add to ensure your form is working correctly.
To: Here, enter the email to which you want to send the queries. By default, this is the admin email, but you can change this to any other email.
From: Here, you need to enter the email from which the email is being sent. Ideally, you should also put your site’s name here, as it will help you later.
Subject: This will be the subject of the email you’ll receive in your inbox. You can customize this with mail tags to automatically include the site title or the message subject.
Message Body: This is where you can customize the body of the email. You can leave this as is since you’ll also be collecting messages in your Google Sheets.
Mail: This is going to be the autoresponder email. This is recommended for scenarios where you want to inform the contacting person about details related to the email or just let them know about the
If necessary, you can also make changes to file attachments, additional headers, and other fields.
Now you have your contact form ready, you can paste the contact form shortcode to display it wherever you want.
Now that our form is ready let’s see how you can connect with Google Sheets.
Connecting Google Sheets and Contact Form 7 using WPSyncSheets
To connect the two services, you need a connector plugin. For this, I recommend using the WPSyncSheets for Contact Form 7 plugin. The plugin is designed specifically for this purpose. You just need to set it up once, and it will work seamlessly without further maintenance or monitoring.
The plugin will create a Google Sheet, and once set up, it will start importing all the form entries on your website in a tabular format.
You can fully control how your data is arranged and make tweaks such as clear, download, or sort sheets using the plugin settings.
You also get additional mail tags on top of the Contact Form 7 plugin mail tags to collect more granular information such as IP address, URL, time, date, etc.
And the best part, you just need to set it up once, and it will continue working until you stop it manually.
Let’s see how you can set up the plugin and collect form information.
Installing WPSyncSheets for Contact Form 7
Before installing the plugin, ensure it is ready on your system. If you do not have the plugin, you can get it here.
To install the plugin, follow these steps:
- Go to Plugins > Add New in your website’s admin area.
- Now click on the Upload plugin button at the top.
- Next, click on the Choose File button and locate the plugin zip file.
- Click on the Install Now button and once the installation is completed, click on the Activate button.

Now you have successfully installed the plugin. You just need to activate the license. For that, go to WPSyncSheets > For Contact Form 7 > License. Copy-paste the license keys in the field and click on the Save button.
WPSyncSheets for Contact Form 7 is now ready to go.
Connecting Google Sheets with Contact Form 7 using API
If you go to the plugin settings page, you will find three fields: Client ID, Client Secret, and Client Token.
You need these three fields to connect the two services. Here’s how you can do it.
Log in to your Google Account and open Google cloud console.
Create a new project by clicking on Select a project > New project.
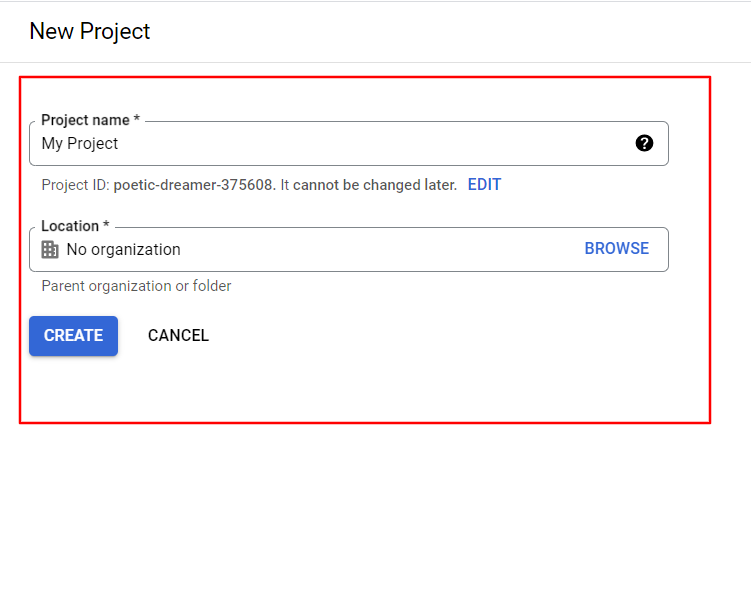
Enter a desired project name and click Create.
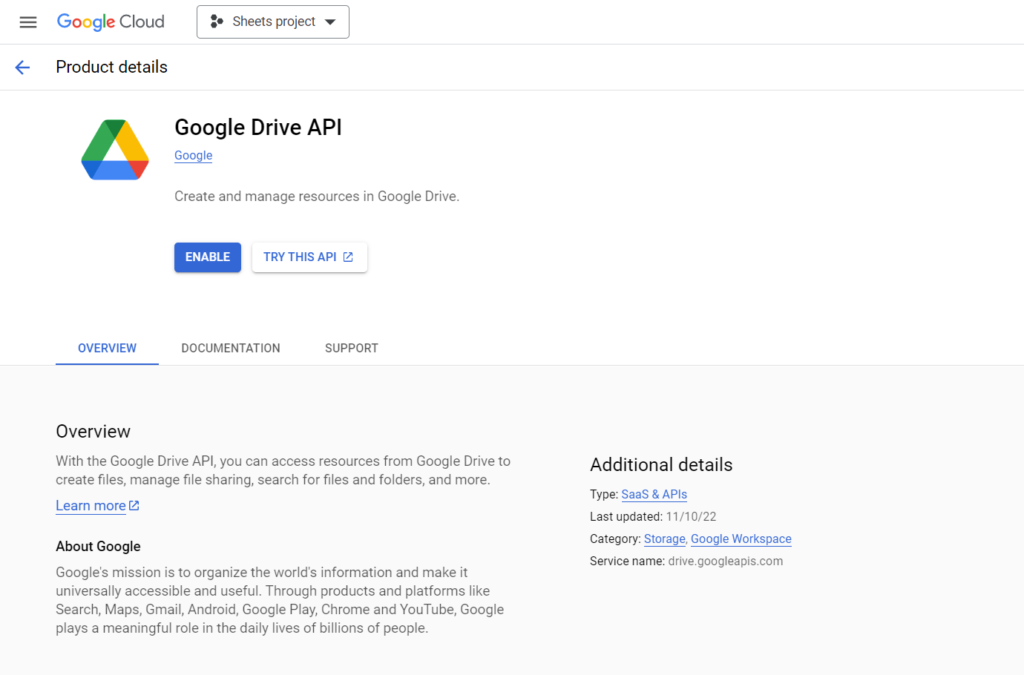
Select the newly created project and click on Enable APIs and Services.

Search for APIs and Services and Enable Google Drive API.
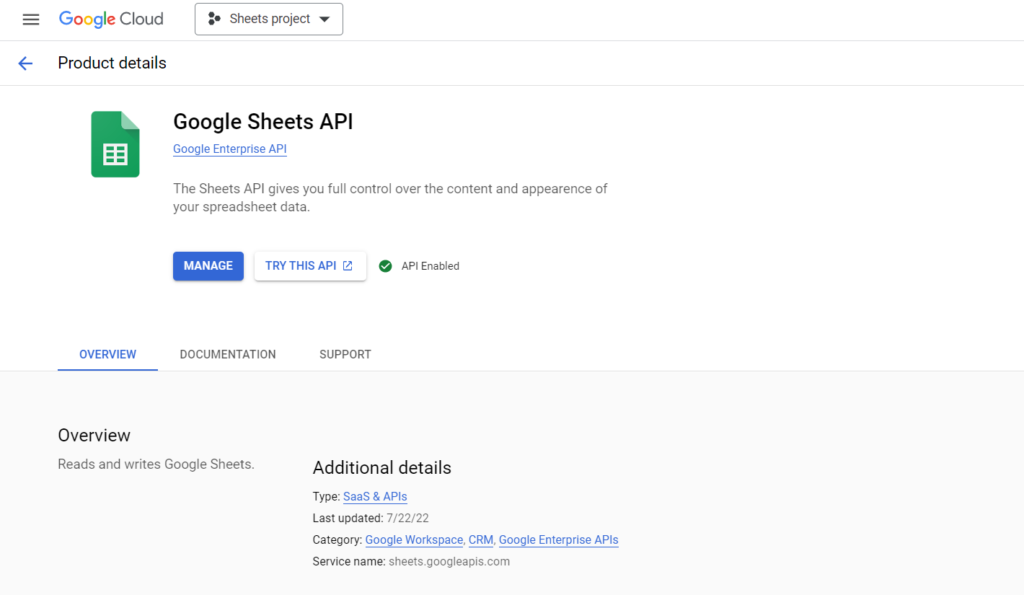
Now go back to APIs and Services > Library and enable the Google Sheets API.
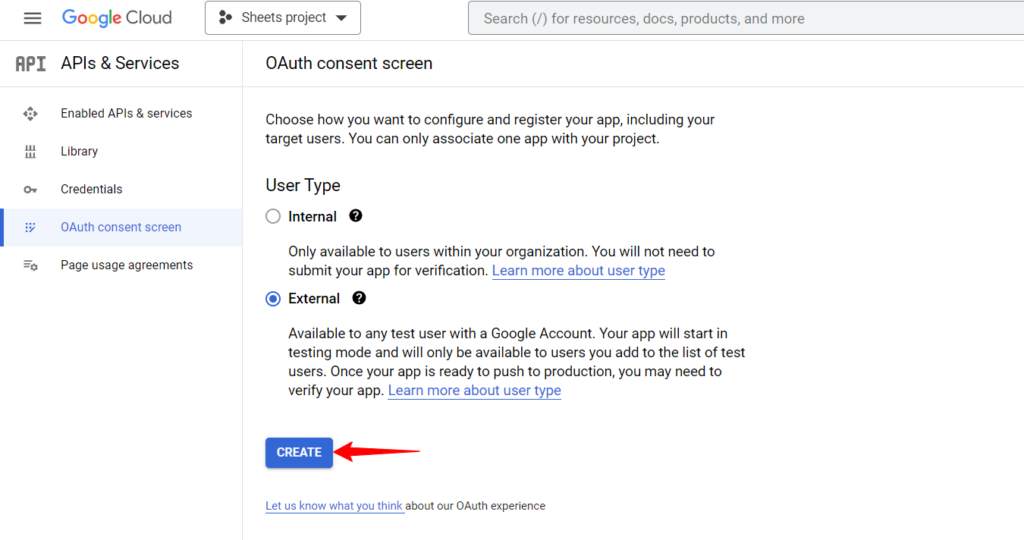
Now again, go back to APIs and Services, click on OAuth Consent Screen, select User Type as External, and click on Create.
Now you need to give your application a name. You can give it any name.
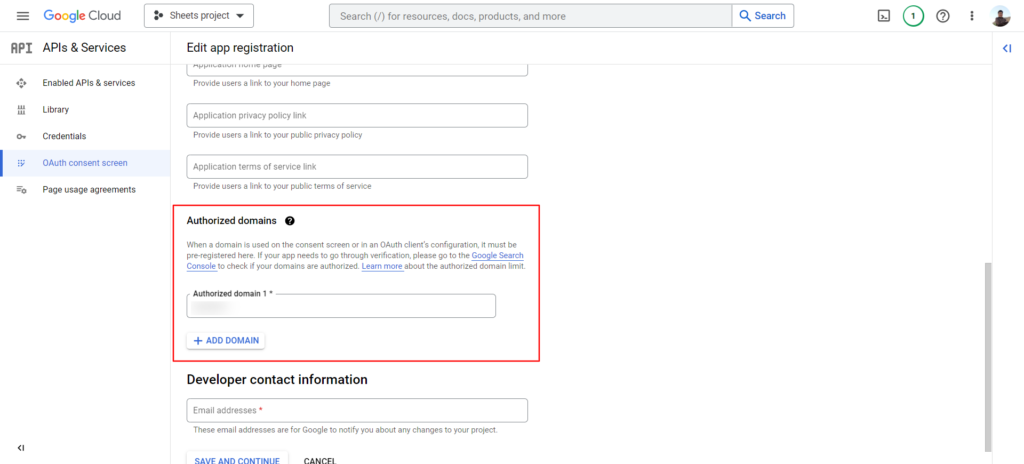
Now open the plugin settings page on your website and copy the Authorised domain link. Finally, paste the link in the Authorised Domain field.
Don’t forget to add your email in the developer contact information field. This can be the same as your Gmail address or your website’s admin address.
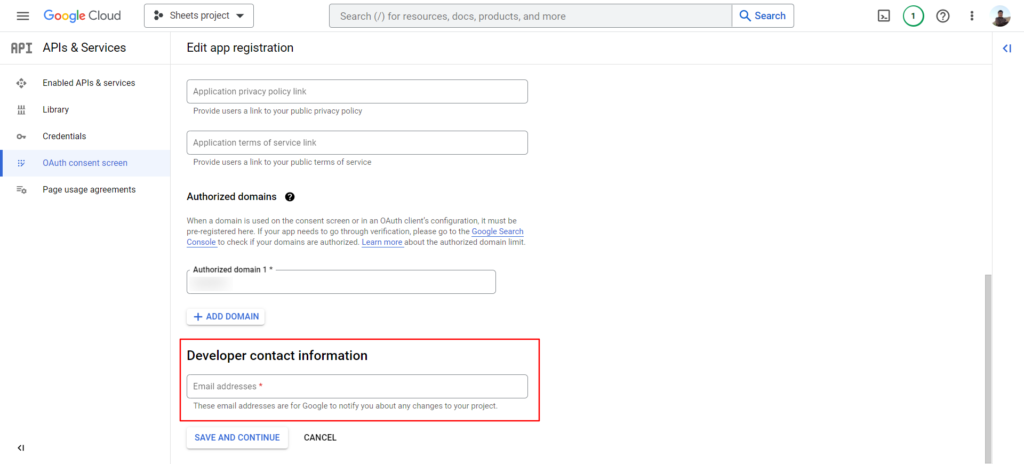
Click on Save and Continue.
We don’t need to make any changes to Scopes and Optional Info. You can simply click on Save and Continue in the next two steps.

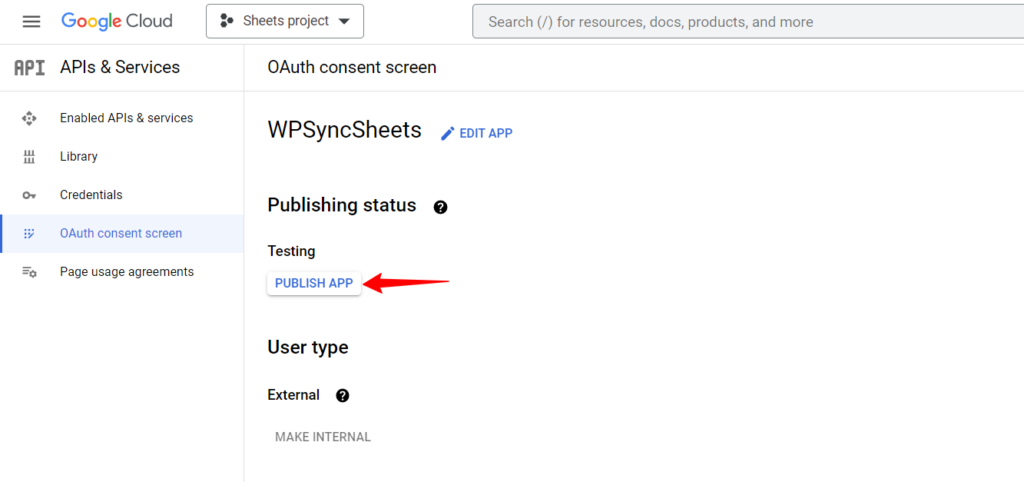
Now publish the app by clicking on the Publish App button.
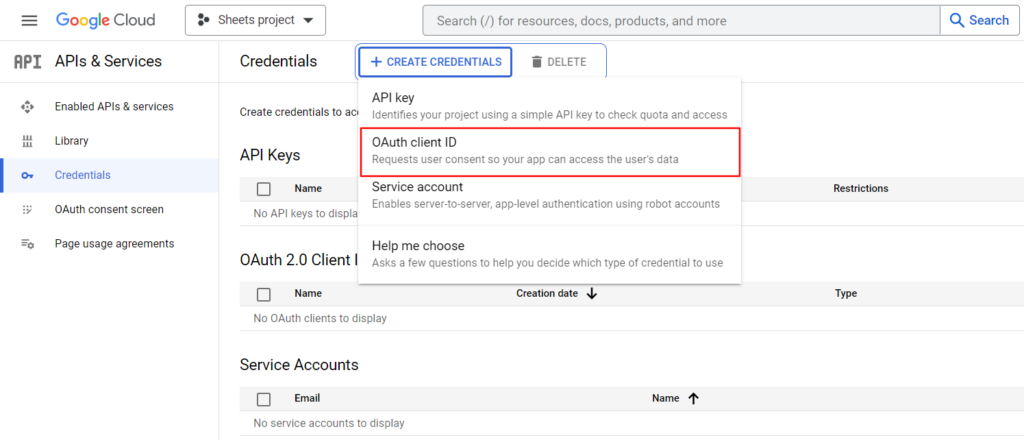
Now finally, you just need to create the credentials you can copy and paste on your website. For this, click on Create Credentials at the top and select OAuth client ID.
Select the application type as Web Application and give it a proper name.
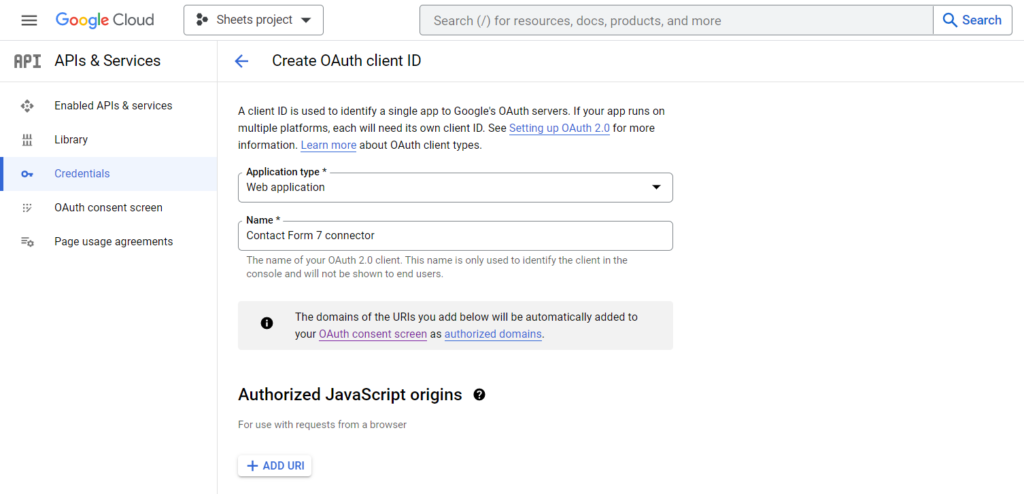
You also need to enter the authorized redirect URIs. You can find this on the plugin settings page on your website. Copy and paste this link into the given field and click on Create button.
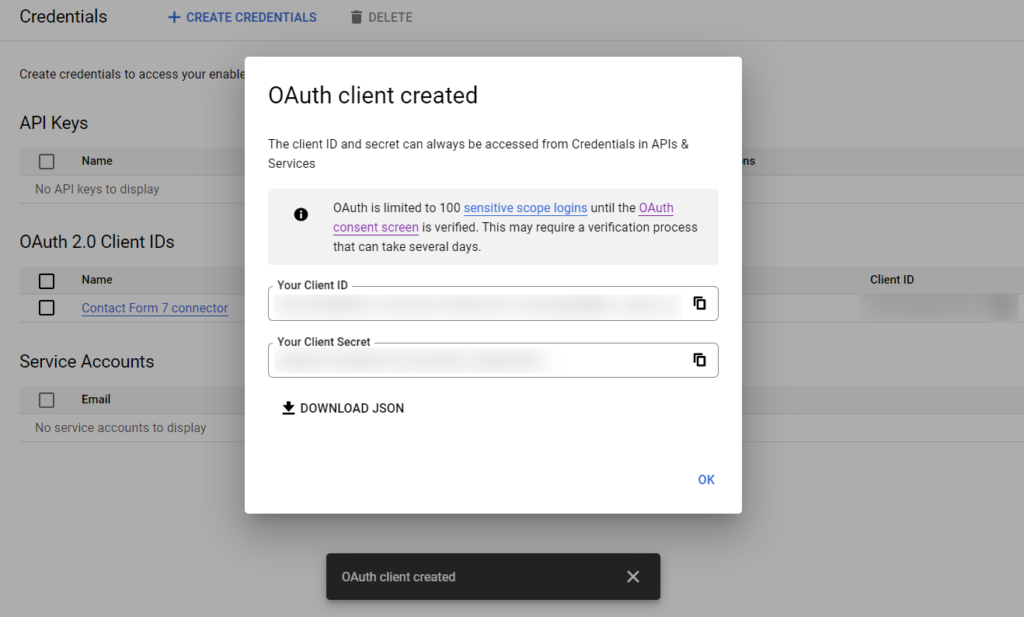
Your credentials should now be generated.
Now all you need to do is copy these credentials and paste them into the plugin settings page. Once you have added the fields, generate the Client Token by clicking the “Click here to generate an authentication token”. The Google Signup process window will show up. Here, allow your website access to the requesting fields by clicking on the allow button.
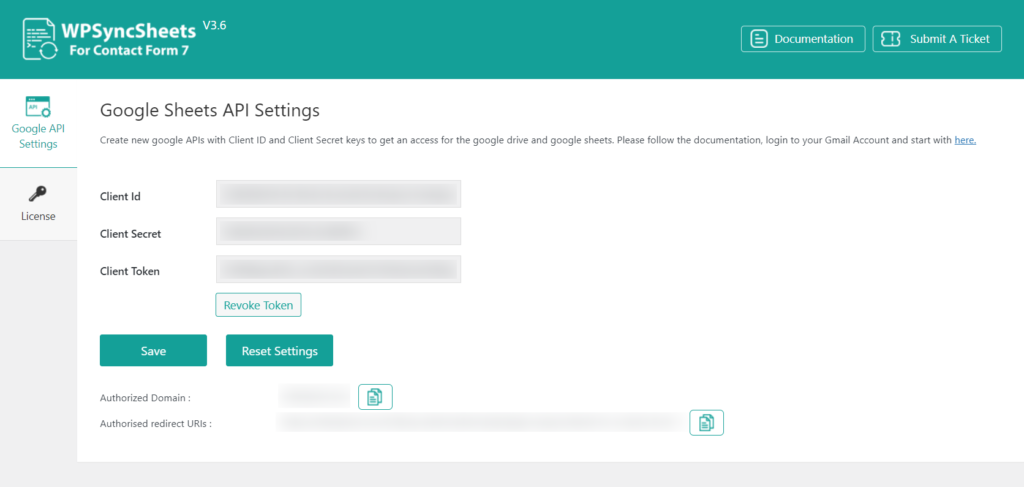
Lastly, click on the Save button.
Setting Up the Spreadsheet
Now that you have everything set up, you can go to Contact > Contact Forms. Here you can locate the WPSyncSheets Settings tab. This is where you get your controls to make changes to the spreadsheets.
This is what the settings page would look like:
If you want to view the Google Sheet, click on the View Spreadsheet button, or if you wish to download it, you can do so by clicking on the Download Spreadsheet button.
You can enable or disable the fields in the spreadsheet by switching on the toggle button for each column. Make sure you click on the Save button at the bottom left corner.
Now you can go ahead and give your form a test spin to see if everything is working the way it should. Of course, you can always go back to the settings page and make changes to the form and the spreadsheet.
Over to you!
In this guide, we learned how to set up and integrate your Google Sheets with Contact Form on your website. The plugin does require quite a few steps in the beginning, but once you are done, you don’t need to go back again to check the status of your plugins. Instead, you can focus solely on the inbound emails and organize the data on your website more accurately.
All this was made possible with the WPSyncSheets Contact Form 7 plugin. The plugin has a solid integration method that does not break even if you make any other changes to your website or the form.
If you do not have the WPSyncSheets Contact Form 7 plugin, you can get it here. This is undoubtedly the best plugin for setting up Contact Form 7 with Google Sheets. Don’t believe me? Give it a try yourself!